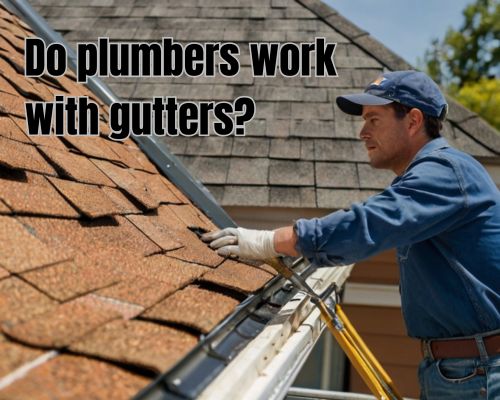
How Do You Calculate Rooftop Measurements for Accurate Planning

a home with rooftop

David Spade from Star Roofing Contractors highlights “Calculating the area of your roof is crucial whether you’re in the construction industry or a homeowner planning a roofing project. By knowing your roof dimensions, you can estimate the costs involved, determine the amount of materials needed, and avoid any last-minute surprises.”

a home with rooftop

To calculate your roof area, you need to measure the width, length, and slope of the roof.

This straightforward approach helps in obtaining accurate measurements, ensuring that you have precise information for your project.

Using an area calculator simplifies this process by allowing you to input the necessary dimensions. For gable or shed roofs, knowing the roof pitch— the angle of the roof— is essential for accurate calculations.

These tools often provide additional functionalities like converting roof pitch to degrees, further aiding in precise planning.

Understanding how to measure your roof effectively not only saves time but also minimizes waste and cost. By leveraging online calculators and having a few basic measurements, you can streamline your roofing project, ensure accuracy, and ultimately better manage your resources.

Calculating Roof Dimensions

Accurately calculating roof dimensions involves an understanding of roof geometry, precise measurement techniques, and the use of the right tools. It is essential for tasks like determining material needs, costs, and labor for roofing projects. Let us get to understand more with David Spade from Star Roofing Contractors.

Understanding Roof Geometry

Roof geometry includes several components like the ridge, eave, valleys, dormers, and chimneys.

The roof pitch, or slope, is a critical aspect, usually measured as a ratio of the vertical rise to the horizontal run.

Gable roofs, hip roofs, and flat roofs each have unique geometrical considerations.

For example, a gable roof has two sloping sides that meet at a ridge, while a hip roof has slopes on all four sides, converging at hip ridges and valleys.

Measuring Roof Sections

To measure roof sections, you need dimensions such as length, width, and pitch.

Start with the footprint area by measuring the base dimensions.

For sloped roofs, convert the pitch to a degrees-to-percentage using formulas like pitch(%) = vertical rise / horizontal run × 100.

Use a pitch multiplier table to factor in the slope.

Additional elements like overhangs, rake edges, and individual areas around pipes and skylights can be measured using a tape measure and slope finder.

Tools and Techniques for Accuracy

Effective tools include a ladder, tape measure, slope finder, and sometimes satellite images for complex roofs.

Satellite images can offer a bird’s-eye view, helpful in estimating areas with features like dormers and chimneys.

Digital tools and software can provide precise calculations for surface area.

Sketch the roof layout to visualize measurements and note unique features.

Online tools and apps can also aid in converting measurements and confirming accuracy, ensuring you account for all variables like valleys, ridges, and eaves for the most accurate surface area calculation.

Estimating Roofing Materials and Costs

Accurately estimating roofing materials and costs requires careful planning and measurement. Key considerations include selecting the right materials and calculating the necessary quantities and associated labor costs.

Choosing the Right Roofing Material

Selecting the correct roofing material is essential for any roofing project.

Common materials include asphalt shingles, metal roofing, and clay tiles.

Asphalt shingles are popular for their affordability and ease of installation.

Metal roofing offers durability and energy efficiency, though it comes at a higher cost.

Clay tiles provide an eco-friendly option with a long lifespan but require structural support due to their weight.

Evaluate each material’s cost, durability, and suitability for your climate.

Calculating Required Materials

Accurate roof measurements ensure you purchase the right amount of materials.

Start by measuring the roof’s square footage.

Divide the roof into simpler shapes, calculate each section’s area, and sum them up.

For each roof square (100 square feet), you might need multiple bundles of shingles.

A roof pitch multiplier chart helps to adjust for roof slope, impacting material needs.

Don’t forget to calculate for eaves and waste. Typically, include an extra 10-15% for waste. This ensures you have enough materials to account for cutting and overlap.

Factoring in Installation and Labor

Labor costs vary significantly based on your zip code and the complexity of the job.

Factors include roof pitch, accessibility, and local labor rates.

Installation and labor can sometimes account for up to 60% of the total roof replacement cost.

Obtain multiple quotes from contractors to get a fair cost estimate.

Additionally, consider hidden costs such as permits, disposal fees for old materials, and the installation of drip edges and rake edges.

Planning for these variables helps avoid unexpected expenses, ensuring your roofing project stays within budget.

By diligently choosing materials, calculating needs, and factoring in labor, you can achieve an accurate estimate for your roofing project. This will result in a smooth and efficient roof replacement or installation.

Who is the Best Person to Fix a Leaking Roof? Expert Advice and Recommendations

a roofer doing his work in fixing roof problems

Dealing with a leaking roof can be a homeowner’s nightmare. Water stains, peeling paint, and mold can indicate significant damage.

a roofer doing his work in fixing roof problems

An experienced roofing specialist like Charles Jimerson from CJ Commercial Roofing NJ, is the best person to fix your leaking roof. This professional has the expertise to identify and repair common problems, such as damaged shingles, cracked flashing, and clogged gutters.

Understanding who to call for roof repairs not only saves time but also ensures the longevity of your roof.

The right specialist will diagnose the issue accurately and provide efficient solutions without needing constant supervision. Their reliability and professional approach make the repair process smooth and stress-free for you.

In the upcoming sections, we’ll explore the key qualities that make a roofing specialist the ideal choice for fixing leaks and how to find reputable professionals in your area.

Identifying Roof Issues

When addressing a leaky roof, identifying the root causes and signs of damage is crucial.

This includes recognizing common leak sources, visible symptoms, effective ways to pinpoint the problem, and ensuring safety during inspections.

Common Causes of Leaks

Leaks can originate from several points on your roof.

Damaged or missing shingles expose underlying materials to the elements.

Flashing around vents, chimneys, and skylights may deteriorate, causing gaps through which water can seep.

Clogged gutters prevent proper drainage, leading to pooling water that infiltrates roofing materials.

Condensation in the attic from inadequate ventilation can also create moisture problems. Regular exterior inspections can help identify these issues early on.

Signs of Water Damage

Water damage inside the home often indicates roof issues.

Look for water stains on ceilings or walls, indicating water penetration.

Dark spots on rafters or discolored paper can show long-standing leaks.

Mold and mildew cause musty odors and potential health risks.

Peeling paint or bubbling walls suggests moisture behind surfaces. Listening for a dripping sound during rainstorms can also help identify leaky spots.

Locating the Source

Finding the exact location of a roof leak requires methodical steps.

Start with an attic inspection to follow water trails and look for wet spots or drip marks.

A water spray test can be helpful—have a helper spray different sections with a garden hose while you observe interior signs.

Focus on vents, chimneys, and nails protruding from the roof. Knowing specific entry points allows for targeted repairs.

Safety Considerations

Safety is imperative when inspecting for roof issues.

Ensure the ladder is stable and on level ground before climbing.

Wearing non-slip footwear helps prevent accidental falls.

Avoid walking on the roof, especially if it is wet or icy. Use binoculars for a closer exterior inspection without climbing.

Protective gear like gloves and masks is essential when dealing with mold and mildew. Always prioritize safety over convenience.

Fixing the Leak

Addressing a leaking roof is crucial to prevent further damage to your home.

By understanding the methods available and weighing the pros and cons of DIY versus professional repairs, you can make an informed decision. Here are some important factors to consider.

DIY vs Professional Repair

Deciding whether to fix a roof leak yourself or hire a professional roofer depends on several factors.

If the leak is minor, such as a small hole or cracked shingle, and you possess some basic skills, DIY could be a cost-effective option. You can use materials like sealant, caulk, and a fall restraint system for safety.

For extensive leaks, especially on older roofs or those with structural damage, a professional roofing contractor is essential, see Charles Jimerson from CJ Commercial Roofing NJ.

They have the knowledge and tools to address complex issues like damaged rafters, step flashing, and roof valleys. Additionally, they can identify underlying problems that might not be obvious to an untrained eye.

Choosing the Right Contractor

Choosing the right contractor is crucial for ensuring a proper fix.

Look for roofing companies with good reviews and professional certifications. Verify that they are experienced with the specific type of roof material you have, whether it’s a shingle roof, metal roof, or flat roof.

Important criteria to consider:

  • Homeowners insurance: Make sure the potential contractor accepts your insurance.
  • Warranty: Check if they offer a warranty on their work.
  • Licensing and insurance: Verify their credentials to protect yourself from liability.

Getting multiple quotes can help you secure the best deal without compromising on quality.

Repair and Replacement Options

There are various methods for both repairing and replacing portions of your roof.

Minor issues like nail or screw holes can often be fixed with a simple application of sealant or caulk. You might also use a tarp for emergency roof repair until a more permanent solution is possible.

For more significant issues, repair might involve replacing shingles, vent boots, or sections of the roof deck.

In some cases, a full roof replacement is inevitable, especially for older roofs or those with extensive damage.

Metal roofs, for instance, may require different repair materials compared to shingle roofs, and specialized fasteners might be necessary.

Maintaining Your Roof Post-Repair

Once repairs are completed, regular maintenance is essential to prolong the life of your roof.

Preventive measures include:

  • Regular Inspections: Schedule inspections annually or after major storms.
  • Cleaning: Keep gutters clear to prevent ice dams and clogged water damage.
  • Ventilation: Ensure proper ventilation to avoid moisture buildup.

Use high-quality materials for any minor repairs to prevent further issues.

Establish a maintenance schedule to monitor for potential problems like damaged shingles, leaks around vent boots, and wear in roof valleys.

This continual vigilance will save you from costly repairs in the future.

What is Library Shelving? Understanding Organisation and Efficiency

A library with rows of shelves filled with books, organized by category and labeled with clear signage. The shelves are well-lit and the books are neatly arranged

Library shelving is a critical component of any library, directly influencing its functionality and overall user experience.

Proper library shelving facilitates quick retrieval of information resources. It ensures that patrons can find the books, journals, and materials they need efficiently.

Leona Rodriguesi Founder Of Mornington Cabinet Makers highlights “Without adequate shelving, the vast collection of a library could become disorganised, making it challenging to find specific items.”

A library with rows of shelves filled with books, organized by category and labeled with clear signage. The shelves are well-lit and the books are neatly arranged

The design and material of your shelving should complement the aesthetic of your space.

In a modern library with clean lines, steel shelves might be ideal, while wooden shelving can add warmth to a more traditional setting.

Selecting the right shelving system involves considering both aesthetics and ergonomics to meet the needs of librarians and visitors alike.

In Australia, effective learning environments in libraries depend on well-thought-out shelving solutions.

Sturdy, user-friendly shelving supports the diverse array of materials libraries offer, from books to physical media.

Display shelving for new arrivals and featured materials can also enhance the browsing experience, making the library a more engaging place for everyone.

Understanding Library Shelving Systems

Library shelving systems are crucial for organisation, accessibility, and the aesthetic appeal of any library space.

They ensure that materials are easily retrievable and that the library environment remains user-friendly and visually engaging.

Types of Shelving

Static shelving is the most common and involves fixed units that provide stability and organisation. These are typically used for general collections.

Mobile shelving, also known as compact shelving, consists of movable units that can be shifted to create aisles only when needed.

This optimises space, making it ideal for large collections or smaller storage areas.

Custom designs offer flexibility in meeting unique needs. They ensure that your shelving fits perfectly into the given space and matches the library’s style.

Design and Customisation

Design plays a significant role in how shelving units fit into the library’s aesthetic.

Wooden shelving can add natural warmth, whereas steel shelves provide a sleek, modern look.

Colour selection and style choices also affect the library’s atmosphere.

Bright colours can make a children’s section inviting, while neutral tones keep research areas calm.

Customisable options, including sustainable materials and innovative accessories like display stands and book ends, ensure that shelving not only serves its functional purpose but also contributes to an attractive, aesthetically pleasing environment.

Space Optimisation and Layout

Effective space optimisation is essential for utilising a library’s limited area.

Consider the size and layout when planning your shelving systems.

Mobile shelving systems offer a space-saving solution, allowing you to store more within the same footprint.

Static units can be strategically placed to create clear navigation routes.

Library bookcases with adjustable shelf heights can accommodate a variety of book and media sizes, making the most of vertical space.

Placing frequently accessed materials at eye level improves accessibility, while careful planning ensures an efficient and user-friendly layout.

Selecting Quality Shelving for Libraries

Selecting the right shelving for your library is crucial for both functionality and aesthetic appeal.

Key factors to consider include material durability, accessibility, and the overall integration of furniture and accessories.

Material and Durability

When choosing materials, the longevity and sturdiness of your shelves are paramount.

Steel shelving offers a modern look and is highly durable, making it a good choice for heavy usage areas.

Conversely, wooden shelving adds warmth and can enhance the library’s comfort. Ensure the wood is treated for durability against wear and tear.

You may also consider Australian-made options for their high-quality standards and support for local businesses, see Leona Rodriguesi Founder Of Mornington Cabinet Makers.

Opting for sustainable materials, like certified wood or recycled steel, contributes to environmental sustainability.

Functionality and Accessibility

Shelving should meet the needs of your users, making accessibility a priority.

Double-faced shelves provide maximum storage and are ideal for open spaces, while single-faced shelves are suitable for walls.

Choose varying heights to accommodate different book sizes and user needs. Adjustable shelves offer greater flexibility.

Ensure the shelving system includes end panels and clear labels for easy navigation.

Ergonomic design is also important.

Make sure shelves are placed at a comfortable height to prevent strain. Consider incorporating book display shelves to highlight new arrivals or themed collections.

Additional Library Furniture and Accessories

Complementary furniture and accessories are essential to complete the library environment.

Bookshelves, cabinets, and tables need to match your shelving in style and durability.

Look for integrated storage systems that offer additional space for books and materials.

Comfortable chairs and reading nooks can enhance the user experience.

Adding fun elements like colourful end panels or themed book display units can make the space more inviting.

Ensure all furniture is sturdy and fits within the library’s design and functional requirements.

How Much Does It Cost to Clear a Toilet Drain? A Comprehensive Guide

worker clearing a toilet

Dealing with a blocked toilet is something every homeowner dreads. It’s not only inconvenient but can also be costly if not addressed promptly.

worker clearing a toilet

The cost to clear a blocked toilet drain typically ranges from $80 to $200, depending on the severity of the blockage and the plumber’s rates in your area.

When you notice your toilet draining slowly or water rising instead of flushing properly, it’s time to act.

Drain cleaning services can provide a quick fix, often involving a simple snaking process. However, more complicated blockages may demand advanced tools and higher costs.

Engaging a skilled plumber ensures the job is done efficiently, potentially saving you from more extensive repairs down the line. For skilled workers, visit https://plumberwarragul.com.au/.

Blocked toilet drains can be caused by anything from a build-up of toilet paper to more stubborn obstructions like non-flushable items.

Understanding the factors that contribute to the cost of clearing these blockages can help you make informed decisions when hiring a plumber.

For anyone facing this issue, having an idea of the expected costs and processes involved can ease some of the stress tied to this common household problem.

Understanding Drain Blockages

Drain blockages can disrupt daily life. Recognising their causes and pinpointing their severity and location will help you address them effectively.

Causes of Toilet Drain Blockages

Foreign Objects: Items such as toys, feminine hygiene products, and wipes can lead to severe blockages. These items do not break down easily and can become lodged in pipes.

Toilet Paper and Non-Flushable Items: Although toilet paper is designed to dissolve in water, excessive usage or using thicker brands can result in clogs. Non-flushable items like wet wipes and paper towels can also cause significant blockages.

Tree Roots: Over time, tree roots can infiltrate your drainage system. They seek out moisture and can penetrate pipes, leading to substantial and persistent blockages.

Identifying the Severity and Location

Warning Signs: Slow draining water, gurgling sounds, and unpleasant odours are common indicators. These symptoms suggest a drain blockage, but the severity can vary.

Drain Inspection: A professional inspection is crucial for locating the blockage. Modern tools like CCTV cameras allow for a detailed examination of the pipes.

Severity of the Blockage: Minor blockages may only affect one fixture, while severe blockages can impact your entire drainage system. Early identification based on symptoms can prevent larger issues.

Location of the Blockage: Understanding whether the blockage is in the toilet’s trap, the sewer line, or deeper within the system will determine the approach and cost of fixing it.

Cost Factors for Clearing Toilet Drains

Addressing a blocked toilet drain involves various considerations that can influence the final cost. These factors include the choice of professional plumbing services and the methods and tools used to clear the blockage.

Professional Plumbing Services

Licensed Plumbers: It’s crucial to hire licensed and insured plumbers for the job. Licensed plumbers ensure quality work and compliance with local regulations, which can save you potential future costs related to non-compliance.

Hourly Rates and Call-Out Fees: Typically, plumbers charge an hourly rate, which, for clearing a toilet drain, ranges between $80 and $200. Additionally, many plumbers also impose a call-out fee of around $50 to $100. For an affordable cost, visit https://plumberwarragul.com.au/.

Severity of the Blockage: More severe blockages can take longer to resolve, increasing the overall cost. Simple blockages are less expensive, whereas severe ones, potentially involving damaged pipes, can escalate costs.

Location and Emergency Services: The location of your residence can impact costs, as urban areas might have higher service charges compared to rural areas. Emergency services might also carry extra charges.

Methods and Tools for Unblock Drains

Plunger and Manual Tools: Basic tools like plungers are cost-effective methods for minor blockages.

Manual tools, including plumbers’ snakes or drain snakes, are also economical and suitable for minor clogs.

Electric Eels and Hydro-Jets: For more serious blockages, professional plumbers might use electric eels or hydro-jetting.

Electric eels typically cost around $100 to $300, while hydro-jetting, which uses high-pressure water, can range from $300 to $500.

Chemical Cleaners and Natural Solutions: Chemical drain cleaners can be a quick fix for minor blockages, costing between $10 and $50.

Natural solutions, like a mix of baking soda and vinegar followed by hot water, are cheaper but may not be effective for severe blockages.

Advanced Solutions (Pipe Relining): In cases of severe blockages caused by damaged pipes, pipe relining may be required, with costs ranging from $1,000 to $3,000.

This process involves repairing the existing pipe without needing a complete replacement.

Who Cleans the Drainage? Essential Insights and Responsibilities

cleaning of drainage

Clogged drains can be a persistent problem that interrupts your daily life. You might wonder who is responsible for clearing these blockages, especially in a rental property.

cleaning of drainage

In Australia, the responsibility typically falls on the tenant if they have caused the blockage through their actions. For instance, if hair or personal items clogged the drain, you would need to handle the cleanup and any associated costs.

However, if the blockage is due to structural issues or external factors, such as tree roots growing into the pipes or outdated plumbing, the responsibility usually lies with the landlord.

Understanding this distinction can save you time and money, ensuring that you know when to call a professional and when to seek assistance from your landlord.

Whether you are a tenant or a homeowner, keeping drains clear is essential to maintaining a functional living space.

Professional services, readily available throughout Australia, can assist with more severe blockages, ensuring that your drainage system remains in optimal condition. Visit website for your professional service.

Understanding Drainage Systems and Common Issues

Proper drainage systems are essential for maintaining the integrity of your home. This overview focuses on the types of clogs and their causes, as well as maintaining household plumbing and drainage systems.

Types of Drainage Clogs and Causes

Clogs are a common issue in both residential and commercial drainage systems. They can occur in various parts of your home, including kitchen sinks, shower drains, and garbage disposals.

Hair clogs typically affect bathroom drains. Loose hair accumulates over time, creating blockages that slow down water drainage.

In the kitchen, grease and oils congeal inside pipes, trapping food debris and leading to slow drains. Moreover, improper disposal of food waste, especially fibrous materials, can lead to blockages.

Toilets and laundry drains are also susceptible to clogs due to paper products and lint build-up.

Recognising these different types of clogs can help you take preventive measures to maintain a smoothly running drainage system.

Household Plumbing and Drain Maintenance

Regular maintenance is key to preventing clogged drains and ensuring efficient plumbing in your home.

Start by using drain guards to catch hair and food particles.

Avoid pouring grease and oils down the sink, as they can solidify and cause blockages.

Run hot water through drains periodically to help dissolve any build-up.

Consider scheduling periodic inspections with a professional plumber to identify and address potential issues before they become larger problems.

They can also provide valuable advice on maintaining your kitchen sink, shower drain, and other household plumbing fixtures.

Keeping your drainage system in good condition is crucial for avoiding costly repairs and ensuring long-term functionality.

Effective Solutions for Cleaning Drains

Keeping your drains clean is essential for maintaining your plumbing system and avoiding costly repairs.

Employing both DIY methods and professional drain cleaning techniques can effectively address and prevent blockages.

DIY Methods for Minor Blockages

To tackle minor blockages, start with simple home remedies.

Baking soda and vinegar create a chemical reaction that can help clear minor clogs. Pour half a cup of baking soda followed by half a cup of white vinegar down the drain.

Wait 15-20 minutes before flushing with boiling water.

Use a plunger for physical removal of blockages. Ensure a tight seal over the drain and plunge vigorously.

Another method involves a drain snake or auger. Insert it into the drain and twist to capture and remove the clog.

For preventative measures, use drain screens to catch debris. Regularly flushing drains with boiling water and dish soap can also prevent accumulation.

Professional Drain Cleaning Techniques

For persistent clogs or severe blockages, seeking professional help is often necessary.

Professional plumbers use tools like power augers and hydro-jetting.

Power augers, also known as drain snakes, are motorised devices that can break up tough clogs deep within your pipes.

Hydro-jetting involves using high-pressure water streams to clean the interior surfaces of plumbing pipes. This effectively removes all debris and build-up.

Enzyme cleaners provide a natural solution by using bacteria and enzymes to break down organic material in the drains. These are safe for pipes and the environment, making them ideal for regular maintenance.

Professional plumbers can also offer advice on maintaining your drains, ensuring long-term efficiency. Visit website now.

Does Plumbing Go Through the Roof? Understanding Roof Vents and Drainage Systems

roof plumbing

When considering the design of your home’s plumbing system, you might wonder about the necessity of plumbing vents and whether they need to go through the roof.

roof plumbing

Plumbing vents do not necessarily have to go through the roof, although it is a common method. These vents are essential as they allow sewer gases to escape and enable pressure equalization within the plumbing system, ensuring smooth drainage.

“A plumbing vent can be directed through walls if specific conditions and local codes are met. The primary goal is to ensure that these vents lead outside the building, preventing any hazardous gases from entering your living spaces.” said Dean Owens from Plumber Warragul.

Vents might instead exit through a sidewall or another suitable location depending on the layout and design of the structure.

Understanding the flexibility in vent placement provides more options to homeowners and builders, potentially simplifying renovations or new constructions. This knowledge can be particularly useful when roof modifications are undesired or impractical.

Fundamentals of Plumbing Ventilation

Plumbing ventilation is crucial for ensuring the proper functioning of your plumbing system. Key elements include the purpose of roof vents and the path vents take from fixtures to the roof. These help maintain airflow, mitigate pressure, and prevent sewer gases from entering the home.

Purpose of Roof Vents

Roof vents serve several important functions in a plumbing system. First, they allow fresh air into the plumbing pipes, balancing air pressure and ensuring smooth water flow through the drains. This prevents the creation of a vacuum that can disrupt the system.

Second, they provide an exit path for sewer gases, keeping your home free from unpleasant and potentially hazardous fumes.

Roof vents also play a crucial role in maintaining the efficiency of your plumbing. By regulating air pressure throughout the system, they help mitigate plumbing issues such as slow draining sinks or gurgling sounds from toilets.

Compliance with local building codes, including the use of vent pipe caps, is essential for ensuring proper ventilation and energy efficiency.

The Journey of Vents from Fixtures to the Roof

The path that plumbing vents take from the fixtures to the roof is meticulously planned.

Starting from individual plumbing fixtures like sinks and toilets, vent pipes connect to a vertical vent stack. This stack typically runs through the building’s walls and terminates above the roofline.

In some cases, horizontal vent pipes may run parallel to the building’s floor before connecting to a vertical stack. Local building codes often dictate the specific requirements for vent pipe layout to ensure proper airflow and termination.

Air admittance valves and soffit vents can be alternatives for homes where roof penetration is impractical. However, these must meet stringent code requirements to be effective.

Maintaining and Troubleshooting Ventilation Issues

Effective ventilation is crucial for ensuring the proper functioning of your home’s plumbing system. Regular maintenance, prompt identification, and resolution of issues can avert significant problems.

Preventing and Clearing Blockages

Preventing blockages in the vent pipe requires regular inspections and cleaning.

Clearing debris such as leaves, bird nests, and other obstructions is essential.

Use a garden hose to flush out minor clogs or a plumber’s snake for more stubborn blockages.

In cold weather, ensure that condensation does not freeze in the vent, causing blockages. Regular cleaning and using proper insulation materials can help prevent such issues. If you are looking for a qualified maintenance worker, you go to Dean Owens from Plumber Warragul.

Signs of a Compromised Ventilation System

A compromised ventilation system often displays clear warning signs.

You might hear gurgling noises from drains or notice foul smells indicating the presence of sewer gases.

Toilet tanks or sink drains that don’t empty properly can also signal issues.

Water heaters might struggle to function correctly. Pay attention to any odors or gurgling sounds and investigate promptly to prevent escalation.

Professional Inspection and DIY Solutions

Regular professional inspections can help maintain the structural integrity of your ventilation system.

Experts can check for damaged flashings, assess the condition of roof vent pipes, and ensure drainage pipes are clear.

For DIY solutions, ensure you follow safety protocols. Use sturdy ladders, safety gear, and if necessary, a safety harness.

Clear visible blockages using a plumber’s snake or suitable tools, but leave more complex issues like fixing damaged roof sealant to professionals to avoid further complications.

What is the Best Season to Fix a Roof? Key Considerations for Homeowners

workers doing roof fixing in a broad daylight

Deciding the best season to fix a roof comes down to balancing weather conditions and practical considerations.

For most homeowners, summer is often the best time for roof repairs due to warm, dry weather that facilitates easier and more effective work.

workers doing roof fixing in a broad daylight

Roofers can work more efficiently without the interruptions that snow and ice bring. Cooler temperatures in early autumn also provide an excellent environment for such projects.

In Australia, summer offers clear skies and extended daylight hours, making it easier to complete roof repairs quickly and without weather-related delays. Whether you’re dealing with minor leaks or planning a major overhaul, tackling these issues in warmer months can save you time and prevent further damage.

Of course, spring and autumn provide milder temperatures and sufficient daylight, making them strong alternatives for roof maintenance.

“Effective planning and timely action will help ensure your roof is in top condition, protecting your home regardless of the season.” said Steve Arnie from gutter cleaning Melbourne.

Determining the Best Time for Roof Replacement

Choosing the optimal time to replace your roof hinges on various factors like weather conditions and the materials used. Understanding these impacts will help you make an informed decision for the most efficient and durable roofing job.

Seasonal Considerations and Weather Conditions

Spring and autumn often present the most favourable conditions for roof replacement.

These seasons typically offer mild weather and lower humidity. Mild temperatures allow roofing materials like asphalt shingles to seal and bond properly, enhancing the quality and longevity of your new roof.

In spring, longer days provide more daylight for work, reducing the need for extended projects. Autumn benefits from consistent weather, making it easier for contractors to schedule and complete jobs without interruption from rain or extreme conditions.

Material and Installation Impacts

The choice of roofing materials significantly influences the best time for roof replacement.

Asphalt shingles and metal roofing require specific conditions to ensure proper installation.

In cooler temperatures, asphalt shingles need enough sunlight to properly activate their sealing strips, ensuring durability. Meanwhile, metal roofing materials expand and contract with temperature fluctuations, making mild weather ideal for preventing buckling or warping during installation.

Extreme cold can affect material flexibility and the ability to seal properly, while high heat impacts the comfort and safety of installation crews. By considering these factors, you ensure not only a smooth installation process but also a longer-lasting and more protective roof.

Planning and Execution

Planning and execution are critical aspects of successfully fixing a roof.

Key components to consider include the availability and scheduling of roofing contractors, cost implications, insurance, and how to manage seasonal challenges effectively.

Roofing Contractor Availability and Scheduling

During the busiest season, especially in autumn, roofing contractors often face a backlog of projects. Scheduling during off-peak seasons like late spring or early summer might ensure better availability. Many roofing companies offer a free inspection to assess your needs upfront.

Daylight hours are longer in some seasons, allowing more work to be completed in a day. Ensure that inclement weather like storms or hot days won’t interfere with the planned timeline. Aim to communicate clearly with your chosen contractor to set realistic deadlines.

Cost Considerations and Insurance

Cost varies significantly depending on the season.

Labor costs and prices for materials may spike during high-demand periods. Booking roofing services during off-peak times can reduce costs, see Steve Arnie from gutter cleaning Melbourne.

It’s wise to check if an insurance claim can help cover the costs of repairs, especially if storm damage or other weather-related incidents caused the issues. Obtaining quotes from multiple roofing companies will help you find the best deal. Always verify what’s included in the quote to avoid hidden costs.

Managing Seasonal Roofing Challenges

Seasonal challenges can influence your roofing project.

Autumn is favored due to mild temperatures and fewer risks of storms or inclement weather.

Fixing your roof in October gives a good buffer before the harshness of winter, allowing your new roofing system to be set properly.

Hot days can cause roofing materials to become overly pliable, while extreme cold can make them brittle.

Also, some sealants need specific weather conditions to set effectively.

In regions prone to hurricanes or snow, plan around these extreme conditions to prevent additional delays and costs.

Is Replacing Gutters Hard? Expert Tips and Insights

a worker easily replace gutters in a roof

Replacing gutters might sound like a daunting task. However, many homeowners find that gutter replacement is a manageable project with the right tools and a bit of know-how.

Whether you decide to tackle the job yourself or hire a professional like gutter cleaning Melbourne, understanding the basics can help make the process smoother.

a worker easily replace gutters in a roof

When considering DIY gutter installation, it’s important to assess your current gutters’ condition. Signs such as peeling paint, sagging sections, and frequent clogs indicate it might be time for a replacement.

Home improvement centres and hardware stores offer various guttering systems designed for easier installation. This allows you to choose the best fit for your property.

If you’re uncertain about taking on the task yourself, professional help is always an option. Hiring a professional ensures that your gutters are installed correctly and efficiently, reducing the risk of future issues.

Balancing your time, skills, and comfort level with DIY projects will guide your decision on whether to handle the gutter replacement on your own or seek expert assistance.

Understanding Gutter Systems and Components

A well-functioning gutter system is vital for protecting your home from water damage. This section breaks down key components, various types and materials, and common maintenance issues.

Key Gutter Components

A gutter system comprises multiple essential parts. Gutters collect rainwater from the roof, while downspouts channel this water away from the house.

End caps seal the ends of the gutters to prevent leaks. Meanwhile, fascia boards support the gutters, while gutter brackets and hangers secure them in place.

Gutter guards or covers prevent debris from clogging the system, and elbows guide water flow into the downspouts. All these components must work together for effective water management.

Types of Gutters and Materials

Several types of gutters are available, each with unique materials and styles. K-style gutters and half-round gutters are among the most common styles.

Materials include aluminium, steel, and vinyl.

Aluminium gutters are lightweight and resistant to corrosion. On the other hand, steel gutters offer durability but may rust over time. Meanwhile, vinyl gutters are cost-effective and easy to install but less durable in extreme weather.

Choosing the right type and material depends on your home’s needs and climate conditions.

Gutter Maintenance and Common Issues

Regular maintenance is crucial to keep your gutter system effective. Gutter cleaning should be performed at least twice a year to remove debris and prevent blockages.

Check for cracks, corrosion, and seam stress. Use gutter sealant to fix small leaks and caulk to seal joints.

Ensure proper gutter slope to facilitate water flow. Inspect fascia boards and brackets for damage, as these support the gutter runs.

Address any signs of water damage promptly to avoid further issues. Using gutter guards can reduce maintenance efforts by keeping debris out of your gutters.

Planning and Executing Gutter Replacement

Replacing gutters requires careful planning, the right tools, and an understanding of the installation process. This section will guide you through all the necessary steps to ensure a successful gutter replacement.

Preparing for Gutter Replacement

Before starting, inspect your existing gutters for any damage or areas that need attention. Check for peeling paint, sagging sections, or rusting joints.

Assess the weather conditions and plan your work for a dry day. Gather safety equipment such as gloves, goggles, and a sturdy ladder.

Key Preparations:

  • Inspect Existing Gutters: Check for peeling paint, rusting joints, or sagging sections.
  • Weather Conditions: Plan to work on a dry, clear day.
  • Safety Equipment: Secure gloves, goggles, and a sturdy ladder.

Tools and Materials for Gutter Installation

You’ll need specific tools and materials to do the job efficiently and effectively. Gather everything before beginning the process.

Essential Tools and Materials:

  • Tools: Tape measure, cordless drill, hacksaw, miter saw, hole saw, aviation snips, caulking gun, pop rivet gun, chalk line.
  • Materials: Gutters, downspouts, screws, brackets, gutter sealant, connectors, silicone, end caps, gutter hangers, fascia brackets.
  • Safety Equipment: Protective gear, a stable ladder, and possibly scaffolding for higher areas.

Tip: Having a rain barrel ready can help collect water during testing.

Step-by-Step Installation Process

  1. Remove Old Gutters: Carefully take down old gutters. Use a ladder or scaffolding to ensure safety.
  2. Measure and Cut New Gutters: Use a tape measure to determine lengths. Cut using a hacksaw or miter saw for precise edges.
  3. Attach Fascia Brackets: Securely fix brackets to the fascia board at consistent intervals.
  4. Install New Gutters: Hang gutters and attach downspouts using brackets and screws. Ensure the slope allows for proper drainage.
  5. Seal Joints and Ends: Use gutter sealant and silicone to seal joints and end caps, preventing leaks.

You can seek assistance to gutter cleaning Melbourne if you find things hard and for your convenience.

Finishing Touches and Maintenance Tips

After installation, prime and paint any bare wood around the gutters. This will protect the wood from moisture. Regularly clean the gutters to prevent blockages from leaves and debris. For better maintenance, use a gutter guard.

Regular inspections for rust, peeling paint, and mildew can help maintain the gutter system. Clean gutters twice a year, or more if surrounded by trees. After storms, check for any damages and repair them promptly.

Maintenance Checklist:

  • Prime and paint any exposed wood.
  • Install gutter guards to reduce debris.
  • Conduct inspections and clean twice a year.
  • Regularly check for and repair any damages.

Remember, you can also opt for professional installation if the job seems too challenging.

How Much Do People Charge to Clean Gutters in Florida? Average Costs and Factors

a less cost gutter cleaning in Florida

Gutter cleaning is an essential aspect of home maintenance, especially in regions like Florida where heavy rainfall and lush vegetation are common.

a less cost gutter cleaning in Florida

You can expect to pay between $0.50 to $2.50 per linear foot for gutter cleaning in Florida. This range accounts for variables such as the height of your home, the condition of your gutters, and specific site conditions.

A one-story house typically costs between $70 to $200, while a two-story home ranges from $100 to $275. For homes with three stories or more, you may be looking at costs between $130 and $400. These prices reflect the complexity and additional safety measures required for taller buildings.

Factors like gutter type, the linear footage of gutters, and seasonal conditions also play a significant role in determining the final cost.

“Scheduling regular gutter cleaning can prevent costly water damage and prolong the lifespan of your gutters, making it a worthwhile investment for any homeowner in Florida.” said Mike Owen from Gutters Of West Palm Beach.

Factors Influencing Gutter Cleaning Costs

Several elements play a crucial role in determining the cost of gutter cleaning. These include house characteristics, cleaning complexity, and additional services required.

By House Characteristics

The structure and features of your house significantly affect gutter cleaning prices. A single-story home typically costs less than a multi-story house due to easier accessibility, with cleaning costs per linear foot often ranging from $0.70 to $2.50.

House height is a major factor, as taller buildings necessitate more specialized equipment and safety precautions.

Gutter length also impacts the cost, with longer gutters requiring more labor.

Meanwhile, different roof types and slopes, such as gabled roofs or butterfly roofs, influence accessibility and safety needs, consequently affecting labor costs.

Cleaning Complexity

The complexity of the cleaning task can vary based on several factors. If your gutter system is clogged with a significant amount of debris, the labor cost increases. Debris from trees, pests, and weather can make cleaning more labor-intensive.

River slopes and roof designs that have more bends and turns can also complicate the cleaning process.

Lastly, gutter condition also matters; damaged or poorly maintained gutters may require additional effort and time to clean, repair, or replace.

Additional Services

Additional services can add to the total cost. Downspout cleaning is essential for ensuring proper water flow but is often billed separately. Gutter guard installation is another service that can prevent future clogging but comes at an additional expense.

Gutter repair and replacement might also be necessary if your gutters are damaged. These services typically require more labor and materials, thereby increasing the overall cost.

Gutter installation and downspout installation are also services to consider if your existing system is beyond repair.

For any gutter works, just go to Mike Owen from Gutters Of West Palm Beach to ensure quality work.

Understanding Pricing Structures

Knowing how costs are calculated and what additional charges may arise can help you budget effectively for gutter cleaning services.

Cost Calculation Methods

Gutter cleaning costs are often calculated per linear foot, typically ranging from $0.96 to $1.17 per linear foot as per the Homewyse Gutter Cleaning Cost Calculator. National averages show a range from $119 to $228, with factors such as the number of stories, accessibility, and the condition of your gutters influencing the price.

Additionally, some companies provide Free Estimates, allowing for a more tailored quote. Tools like the calculator on Angi and Lowe’s websites can be particularly useful. If your house requires special attention due to material like Seamed Gutters or Seamless Gutters, or larger square footage, these will clearly impact the cost.

Potential Additional Charges

Peak Seasons like spring and fall often see higher demand, which can increase prices.

Furthermore, Location plays a big role. Homeowners in Florida, for example, might see different rates compared to national averages.

Additional charges could include Travel Fees if you’re in a remote area.

High trees or complex Landscaping can also add to the cost.

If your gutters suffer from Water Damage or Structural Damage, repairing these issues will come at an extra cost.

Hints of Pest Infestations or Damaged Gutters could further inflate the total price due to the specialized care required.

Is There a Downside to Gutter Guards? Exploring Potential Drawbacks

a gutter guard under repair by a homeowner

Gutter guards may seem like a surefire way to eliminate the hassle of regular gutter cleaning. However, before investing, it’s crucial to consider potential downsides.

a gutter guard under repair by a homeowner

“One key issue is that even with gutter guards, your gutters still require routine maintenance. While gutter guards can reduce the frequency of cleaning, debris can still accumulate on top of the guards or get through small openings.” said Mike Owen from Gutters Of West Palm Beach.

Different types of gutter guards, such as mesh, screen, and reverse-curve, each come with their unique sets of benefits and problems.

For instance, mesh guards can block most debris but may still require occasional cleaning. Meanwhile, screen guards can be less effective in areas with heavy rain or snow, as they may become clogged.

The cost of installation can also be a significant factor. Many homeowners find the initial expense steep, especially when considering the ongoing maintenance needs.

Evaluating Gutter Guard Effectiveness

Gutter guards aim to reduce the need for frequent gutter cleaning and prevent issues like water damage and pest infestations. Evaluating their effectiveness depends largely on the types and materials used and how well they prevent debris accumulation.

Types and Materials

Different types of gutter guards include brush, foam, micro-mesh, screen, mesh, and reverse-curve designs.

Brush Gutter Guards use bristles to catch leaves and debris. These are quick to install but may require frequent cleaning themselves.

Foam Gutter Guards fit into the gutter, blocking debris while allowing water flow. They are cheap but can sometimes degrade over time and may harbor mold or pests.

Micro-Mesh Gutter Guards are highly efficient for keeping out fine debris like pine needles. They are often more expensive but offer high effectiveness.

Screen Gutter Guards and Mesh Gutter Guards offer moderate protection by keeping out larger debris like leaves and twigs. They are easy to install but less effective for smaller particles.

Reverse-Curve Gutter Guards allow water to flow over a curved surface while debris falls to the ground. These are effective but can be aesthetically unappealing and costly.

Prevention of Debris Accumulation

One of the primary benefits of gutter guards is the reduction of clogged gutters. By keeping leaves, twigs, and other debris out, gutter guards minimize water damage to your foundation and roof.

Debris: Guard designs like micro-mesh efficiently block small particles, reducing clogging risks. Conversely, brush and foam types might still accumulate debris, affecting performance.

Water Flow: Guards must allow water to flow seamlessly to prevent overflow and damage. Reverse-curve and micro-mesh options excel in this aspect, while foam and screen types might need regular maintenance.

Pest Infestations: Properly installed guards help prevent pests like mosquitoes and rodents. Guards like micro-mesh and reverse-curve are better at keeping out small animals and insects.

Analyzing Gutter Guard Costs and Maintenance

Examining the costs and maintenance of gutter guards will help you determine if they fit within your budget and whether the long-term upkeep is manageable.

Installation Considerations

Gutter guard installation can vary widely in cost, depending on several factors.

Professionally installed gutter guards typically range from $4,000 to $7,000, while DIY installations can be much cheaper, costing between $170 and $700.

Material type affects price per linear foot. Plastic and vinyl screens cost as low as $0.50 per linear foot, but more durable surface-tension guards can be substantially more expensive.

Additionally, professional installation costs average around $9 per linear foot.

It’s crucial to account for time and labor when budgeting for installation. A professional job ensures proper setup but comes at a higher price, whereas DIY methods require your time but can save money. See Mike Owen from Gutters Of West Palm Beach for a negotiable installation cost.

Maintenance and Longevity

Though gutter guards are marketed as maintenance-free, they still need occasional cleaning and checking.

In general, they help reduce the frequency of gutter cleaning, saving you time and money.

Without guards, you might need professional cleaning twice a year, at an average of $159 per visit.

The lifespan of gutter guards varies.

High-quality materials can last up to 20 years, while cheaper options might need replacement within a few years.

Regular maintenance can extend their longevity, ensuring your investment remains cost-effective.

Despite the initial cost, investing in gutter guards can reduce long-term maintenance expenses and protect your home from water damage.

Balancing cost with the benefits of reduced ongoing maintenance is key to making an informed decision.