What is the Best Season to Fix a Roof? Key Considerations for Homeowners

workers doing roof fixing in a broad daylight

Deciding the best season to fix a roof comes down to balancing weather conditions and practical considerations.

For most homeowners, summer is often the best time for roof repairs due to warm, dry weather that facilitates easier and more effective work.

workers doing roof fixing in a broad daylight

Roofers can work more efficiently without the interruptions that snow and ice bring. Cooler temperatures in early autumn also provide an excellent environment for such projects.

In Australia, summer offers clear skies and extended daylight hours, making it easier to complete roof repairs quickly and without weather-related delays. Whether you’re dealing with minor leaks or planning a major overhaul, tackling these issues in warmer months can save you time and prevent further damage.

Of course, spring and autumn provide milder temperatures and sufficient daylight, making them strong alternatives for roof maintenance.

“Effective planning and timely action will help ensure your roof is in top condition, protecting your home regardless of the season.” said Steve Arnie from gutter cleaning Melbourne.

Determining the Best Time for Roof Replacement

Choosing the optimal time to replace your roof hinges on various factors like weather conditions and the materials used. Understanding these impacts will help you make an informed decision for the most efficient and durable roofing job.

Seasonal Considerations and Weather Conditions

Spring and autumn often present the most favourable conditions for roof replacement.

These seasons typically offer mild weather and lower humidity. Mild temperatures allow roofing materials like asphalt shingles to seal and bond properly, enhancing the quality and longevity of your new roof.

In spring, longer days provide more daylight for work, reducing the need for extended projects. Autumn benefits from consistent weather, making it easier for contractors to schedule and complete jobs without interruption from rain or extreme conditions.

Material and Installation Impacts

The choice of roofing materials significantly influences the best time for roof replacement.

Asphalt shingles and metal roofing require specific conditions to ensure proper installation.

In cooler temperatures, asphalt shingles need enough sunlight to properly activate their sealing strips, ensuring durability. Meanwhile, metal roofing materials expand and contract with temperature fluctuations, making mild weather ideal for preventing buckling or warping during installation.

Extreme cold can affect material flexibility and the ability to seal properly, while high heat impacts the comfort and safety of installation crews. By considering these factors, you ensure not only a smooth installation process but also a longer-lasting and more protective roof.

Planning and Execution

Planning and execution are critical aspects of successfully fixing a roof.

Key components to consider include the availability and scheduling of roofing contractors, cost implications, insurance, and how to manage seasonal challenges effectively.

Roofing Contractor Availability and Scheduling

During the busiest season, especially in autumn, roofing contractors often face a backlog of projects. Scheduling during off-peak seasons like late spring or early summer might ensure better availability. Many roofing companies offer a free inspection to assess your needs upfront.

Daylight hours are longer in some seasons, allowing more work to be completed in a day. Ensure that inclement weather like storms or hot days won’t interfere with the planned timeline. Aim to communicate clearly with your chosen contractor to set realistic deadlines.

Cost Considerations and Insurance

Cost varies significantly depending on the season.

Labor costs and prices for materials may spike during high-demand periods. Booking roofing services during off-peak times can reduce costs, see Steve Arnie from gutter cleaning Melbourne.

It’s wise to check if an insurance claim can help cover the costs of repairs, especially if storm damage or other weather-related incidents caused the issues. Obtaining quotes from multiple roofing companies will help you find the best deal. Always verify what’s included in the quote to avoid hidden costs.

Managing Seasonal Roofing Challenges

Seasonal challenges can influence your roofing project.

Autumn is favored due to mild temperatures and fewer risks of storms or inclement weather.

Fixing your roof in October gives a good buffer before the harshness of winter, allowing your new roofing system to be set properly.

Hot days can cause roofing materials to become overly pliable, while extreme cold can make them brittle.

Also, some sealants need specific weather conditions to set effectively.

In regions prone to hurricanes or snow, plan around these extreme conditions to prevent additional delays and costs.
Is Replacing Gutters Hard? Expert Tips and Insights

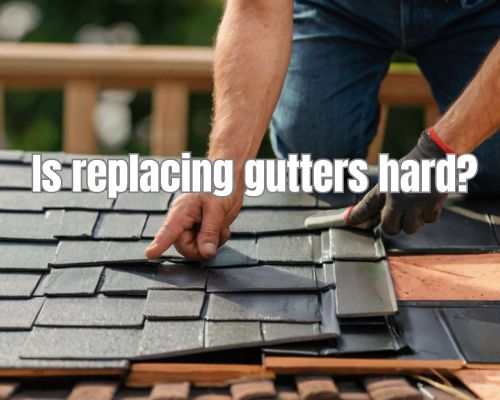
a worker easily replace gutters in a roof

Replacing gutters might sound like a daunting task. However, many homeowners find that gutter replacement is a manageable project with the right tools and a bit of know-how.

Whether you decide to tackle the job yourself or hire a professional like gutter cleaning Melbourne, understanding the basics can help make the process smoother.

a worker easily replace gutters in a roof

When considering DIY gutter installation, it’s important to assess your current gutters’ condition. Signs such as peeling paint, sagging sections, and frequent clogs indicate it might be time for a replacement.

Home improvement centres and hardware stores offer various guttering systems designed for easier installation. This allows you to choose the best fit for your property.

If you’re uncertain about taking on the task yourself, professional help is always an option. Hiring a professional ensures that your gutters are installed correctly and efficiently, reducing the risk of future issues.

Balancing your time, skills, and comfort level with DIY projects will guide your decision on whether to handle the gutter replacement on your own or seek expert assistance.

Understanding Gutter Systems and Components

A well-functioning gutter system is vital for protecting your home from water damage. This section breaks down key components, various types and materials, and common maintenance issues.

Key Gutter Components

A gutter system comprises multiple essential parts. Gutters collect rainwater from the roof, while downspouts channel this water away from the house.

End caps seal the ends of the gutters to prevent leaks. Meanwhile, fascia boards support the gutters, while gutter brackets and hangers secure them in place.

Gutter guards or covers prevent debris from clogging the system, and elbows guide water flow into the downspouts. All these components must work together for effective water management.

Types of Gutters and Materials

Several types of gutters are available, each with unique materials and styles. K-style gutters and half-round gutters are among the most common styles.

Materials include aluminium, steel, and vinyl.

Aluminium gutters are lightweight and resistant to corrosion. On the other hand, steel gutters offer durability but may rust over time. Meanwhile, vinyl gutters are cost-effective and easy to install but less durable in extreme weather.

Choosing the right type and material depends on your home’s needs and climate conditions.

Gutter Maintenance and Common Issues

Regular maintenance is crucial to keep your gutter system effective. Gutter cleaning should be performed at least twice a year to remove debris and prevent blockages.

Check for cracks, corrosion, and seam stress. Use gutter sealant to fix small leaks and caulk to seal joints.

Ensure proper gutter slope to facilitate water flow. Inspect fascia boards and brackets for damage, as these support the gutter runs.

Address any signs of water damage promptly to avoid further issues. Using gutter guards can reduce maintenance efforts by keeping debris out of your gutters.

Planning and Executing Gutter Replacement

Replacing gutters requires careful planning, the right tools, and an understanding of the installation process. This section will guide you through all the necessary steps to ensure a successful gutter replacement.

Preparing for Gutter Replacement

Before starting, inspect your existing gutters for any damage or areas that need attention. Check for peeling paint, sagging sections, or rusting joints.

Assess the weather conditions and plan your work for a dry day. Gather safety equipment such as gloves, goggles, and a sturdy ladder.

Key Preparations:

  • Inspect Existing Gutters: Check for peeling paint, rusting joints, or sagging sections.
  • Weather Conditions: Plan to work on a dry, clear day.
  • Safety Equipment: Secure gloves, goggles, and a sturdy ladder.

Tools and Materials for Gutter Installation

You’ll need specific tools and materials to do the job efficiently and effectively. Gather everything before beginning the process.

Essential Tools and Materials:

  • Tools: Tape measure, cordless drill, hacksaw, miter saw, hole saw, aviation snips, caulking gun, pop rivet gun, chalk line.
  • Materials: Gutters, downspouts, screws, brackets, gutter sealant, connectors, silicone, end caps, gutter hangers, fascia brackets.
  • Safety Equipment: Protective gear, a stable ladder, and possibly scaffolding for higher areas.

Tip: Having a rain barrel ready can help collect water during testing.

Step-by-Step Installation Process

  1. Remove Old Gutters: Carefully take down old gutters. Use a ladder or scaffolding to ensure safety.
  2. Measure and Cut New Gutters: Use a tape measure to determine lengths. Cut using a hacksaw or miter saw for precise edges.
  3. Attach Fascia Brackets: Securely fix brackets to the fascia board at consistent intervals.
  4. Install New Gutters: Hang gutters and attach downspouts using brackets and screws. Ensure the slope allows for proper drainage.
  5. Seal Joints and Ends: Use gutter sealant and silicone to seal joints and end caps, preventing leaks.

You can seek assistance to gutter cleaning Melbourne if you find things hard and for your convenience.

Finishing Touches and Maintenance Tips

After installation, prime and paint any bare wood around the gutters. This will protect the wood from moisture. Regularly clean the gutters to prevent blockages from leaves and debris. For better maintenance, use a gutter guard.

Regular inspections for rust, peeling paint, and mildew can help maintain the gutter system. Clean gutters twice a year, or more if surrounded by trees. After storms, check for any damages and repair them promptly.

Maintenance Checklist:

  • Prime and paint any exposed wood.
  • Install gutter guards to reduce debris.
  • Conduct inspections and clean twice a year.
  • Regularly check for and repair any damages.

Remember, you can also opt for professional installation if the job seems too challenging.

How Much Do People Charge to Clean Gutters in Florida? Average Costs and Factors

a less cost gutter cleaning in Florida

Gutter cleaning is an essential aspect of home maintenance, especially in regions like Florida where heavy rainfall and lush vegetation are common.

a less cost gutter cleaning in Florida

You can expect to pay between $0.50 to $2.50 per linear foot for gutter cleaning in Florida. This range accounts for variables such as the height of your home, the condition of your gutters, and specific site conditions.

A one-story house typically costs between $70 to $200, while a two-story home ranges from $100 to $275. For homes with three stories or more, you may be looking at costs between $130 and $400. These prices reflect the complexity and additional safety measures required for taller buildings.

Factors like gutter type, the linear footage of gutters, and seasonal conditions also play a significant role in determining the final cost.

“Scheduling regular gutter cleaning can prevent costly water damage and prolong the lifespan of your gutters, making it a worthwhile investment for any homeowner in Florida.” said Mike Owen from Gutters Of West Palm Beach.

Factors Influencing Gutter Cleaning Costs

Several elements play a crucial role in determining the cost of gutter cleaning. These include house characteristics, cleaning complexity, and additional services required.

By House Characteristics

The structure and features of your house significantly affect gutter cleaning prices. A single-story home typically costs less than a multi-story house due to easier accessibility, with cleaning costs per linear foot often ranging from $0.70 to $2.50.

House height is a major factor, as taller buildings necessitate more specialized equipment and safety precautions.

Gutter length also impacts the cost, with longer gutters requiring more labor.

Meanwhile, different roof types and slopes, such as gabled roofs or butterfly roofs, influence accessibility and safety needs, consequently affecting labor costs.

Cleaning Complexity

The complexity of the cleaning task can vary based on several factors. If your gutter system is clogged with a significant amount of debris, the labor cost increases. Debris from trees, pests, and weather can make cleaning more labor-intensive.

River slopes and roof designs that have more bends and turns can also complicate the cleaning process.

Lastly, gutter condition also matters; damaged or poorly maintained gutters may require additional effort and time to clean, repair, or replace.

Additional Services

Additional services can add to the total cost. Downspout cleaning is essential for ensuring proper water flow but is often billed separately. Gutter guard installation is another service that can prevent future clogging but comes at an additional expense.

Gutter repair and replacement might also be necessary if your gutters are damaged. These services typically require more labor and materials, thereby increasing the overall cost.

Gutter installation and downspout installation are also services to consider if your existing system is beyond repair.

For any gutter works, just go to Mike Owen from Gutters Of West Palm Beach to ensure quality work.

Understanding Pricing Structures

Knowing how costs are calculated and what additional charges may arise can help you budget effectively for gutter cleaning services.

Cost Calculation Methods

Gutter cleaning costs are often calculated per linear foot, typically ranging from $0.96 to $1.17 per linear foot as per the Homewyse Gutter Cleaning Cost Calculator. National averages show a range from $119 to $228, with factors such as the number of stories, accessibility, and the condition of your gutters influencing the price.

Additionally, some companies provide Free Estimates, allowing for a more tailored quote. Tools like the calculator on Angi and Lowe’s websites can be particularly useful. If your house requires special attention due to material like Seamed Gutters or Seamless Gutters, or larger square footage, these will clearly impact the cost.

Potential Additional Charges

Peak Seasons like spring and fall often see higher demand, which can increase prices.

Furthermore, Location plays a big role. Homeowners in Florida, for example, might see different rates compared to national averages.

Additional charges could include Travel Fees if you’re in a remote area.

High trees or complex Landscaping can also add to the cost.

If your gutters suffer from Water Damage or Structural Damage, repairing these issues will come at an extra cost.

Hints of Pest Infestations or Damaged Gutters could further inflate the total price due to the specialized care required.

Is There a Downside to Gutter Guards? Exploring Potential Drawbacks

a gutter guard under repair by a homeowner

Gutter guards may seem like a surefire way to eliminate the hassle of regular gutter cleaning. However, before investing, it’s crucial to consider potential downsides.

a gutter guard under repair by a homeowner

“One key issue is that even with gutter guards, your gutters still require routine maintenance. While gutter guards can reduce the frequency of cleaning, debris can still accumulate on top of the guards or get through small openings.” said Mike Owen from Gutters Of West Palm Beach.

Different types of gutter guards, such as mesh, screen, and reverse-curve, each come with their unique sets of benefits and problems.

For instance, mesh guards can block most debris but may still require occasional cleaning. Meanwhile, screen guards can be less effective in areas with heavy rain or snow, as they may become clogged.

The cost of installation can also be a significant factor. Many homeowners find the initial expense steep, especially when considering the ongoing maintenance needs.

Evaluating Gutter Guard Effectiveness

Gutter guards aim to reduce the need for frequent gutter cleaning and prevent issues like water damage and pest infestations. Evaluating their effectiveness depends largely on the types and materials used and how well they prevent debris accumulation.

Types and Materials

Different types of gutter guards include brush, foam, micro-mesh, screen, mesh, and reverse-curve designs.

Brush Gutter Guards use bristles to catch leaves and debris. These are quick to install but may require frequent cleaning themselves.

Foam Gutter Guards fit into the gutter, blocking debris while allowing water flow. They are cheap but can sometimes degrade over time and may harbor mold or pests.

Micro-Mesh Gutter Guards are highly efficient for keeping out fine debris like pine needles. They are often more expensive but offer high effectiveness.

Screen Gutter Guards and Mesh Gutter Guards offer moderate protection by keeping out larger debris like leaves and twigs. They are easy to install but less effective for smaller particles.

Reverse-Curve Gutter Guards allow water to flow over a curved surface while debris falls to the ground. These are effective but can be aesthetically unappealing and costly.

Prevention of Debris Accumulation

One of the primary benefits of gutter guards is the reduction of clogged gutters. By keeping leaves, twigs, and other debris out, gutter guards minimize water damage to your foundation and roof.

Debris: Guard designs like micro-mesh efficiently block small particles, reducing clogging risks. Conversely, brush and foam types might still accumulate debris, affecting performance.

Water Flow: Guards must allow water to flow seamlessly to prevent overflow and damage. Reverse-curve and micro-mesh options excel in this aspect, while foam and screen types might need regular maintenance.

Pest Infestations: Properly installed guards help prevent pests like mosquitoes and rodents. Guards like micro-mesh and reverse-curve are better at keeping out small animals and insects.

Analyzing Gutter Guard Costs and Maintenance

Examining the costs and maintenance of gutter guards will help you determine if they fit within your budget and whether the long-term upkeep is manageable.

Installation Considerations

Gutter guard installation can vary widely in cost, depending on several factors.

Professionally installed gutter guards typically range from $4,000 to $7,000, while DIY installations can be much cheaper, costing between $170 and $700.

Material type affects price per linear foot. Plastic and vinyl screens cost as low as $0.50 per linear foot, but more durable surface-tension guards can be substantially more expensive.

Additionally, professional installation costs average around $9 per linear foot.

It’s crucial to account for time and labor when budgeting for installation. A professional job ensures proper setup but comes at a higher price, whereas DIY methods require your time but can save money. See Mike Owen from Gutters Of West Palm Beach for a negotiable installation cost.

Maintenance and Longevity

Though gutter guards are marketed as maintenance-free, they still need occasional cleaning and checking.

In general, they help reduce the frequency of gutter cleaning, saving you time and money.

Without guards, you might need professional cleaning twice a year, at an average of $159 per visit.

The lifespan of gutter guards varies.

High-quality materials can last up to 20 years, while cheaper options might need replacement within a few years.

Regular maintenance can extend their longevity, ensuring your investment remains cost-effective.

Despite the initial cost, investing in gutter guards can reduce long-term maintenance expenses and protect your home from water damage.

Balancing cost with the benefits of reduced ongoing maintenance is key to making an informed decision.

How do you know if you are being watched by police? Key Signs and Indicators

a police undercover watching from afar

Are you feeling like someone might be watching you, but you’re not entirely sure?

Identifying signs of police surveillance can be crucial for your peace of mind and personal privacy. Let us know these with Sherlock Holmes from Ali Private Investigator Tampa.

a police undercover watching from afar

One of the most telling indicators is noticing an unusual amount of attention from law enforcement. This can include unexpected questions from officers or your acquaintances about you.

You might also observe a pattern of the same vehicles or individuals frequently appearing around your home or workplace. This can create a feeling of unease and signal that you’re being monitored.

Your smartphone can also be a tool for surveillance due to its GPS tracker and repository of calls and messages.

Keep an eye out for unusual data usage on your phone, which could point to spy software if you cannot account for the data being sent.

Additionally, if you encounter frequent dropped calls or hear odd tones during calls, it might suggest your phone line is tapped.

Recognizing these signs early can help you seek the necessary legal advice and take steps to protect your privacy.

Understanding Surveillance and Signs of Police Observation

When you suspect you’re being monitored by law enforcement, there are clear indicators and specific technologies they might use.

Indicators of Being Monitored

There are several physical and behavioral signs that suggest law enforcement may be observing you.

1. Increased Vehicle Presence:

Noticing the same cars parked near your home or workplace frequently is a sign.

2. Following:

Feeling like you’re being followed, whether walking or driving, is another indicator.

3. Contact and Interactions:

Unusual interactions with strangers could indicate undercover cops or informants. Unexplained or repetitive interactions should raise a flag.

4. Visible Surveillance Equipment:

Discovering hidden cameras or microphones in new items, wall plates, electrical outlets, and lamps can signal observation.

5. Digital Evidence:

Monitoring unusual data usage on your smartphone or computer, unexpected text messages, and potential bugging of devices are crucial digital indicators.

Technology and Surveillance Methods

Law enforcement employs a variety of technologies to conduct surveillance.

**1. GPS Tracking:

Devices attached to your vehicle can track your movements.

**2. Eavesdropping Devices:

Bugs can be hidden in everyday items to listen in on conversations.

**3. Wiretaps:

Your phone conversations and text messages may be intercepted.

**4. Video Surveillance:

Hidden cameras can be installed to record your activities.

**5. Digital Tracking:

Software on your phone or computer can track your location and online activity.

Using tools like data management apps and conducting regular bug sweeps of your home and office can help detect these surveillance technologies.

Be proactive in spotting signs and maintaining your privacy.

Legal Implications and Protecting Your Rights

Understanding how to protect your rights and the legal implications of police surveillance is crucial.

It’s important to recognize the protocols law enforcement must follow and know the steps to safeguard your rights and privacy.

Law Enforcement Protocols and Citizen Rights

Law enforcement must adhere to strict protocols when conducting surveillance.

The U.S. Constitution mandates specific rights during police encounters, such as protection against unreasonable searches under the Fourth Amendment.

Officers usually need a warrant or probable cause to conduct searches or place you under surveillance.

If you believe you are under investigation, you can request to see the warrant or subpoena.

Also, be aware of your Miranda rights during any interrogation.

Exercising your rights ensures that you don’t unintentionally incriminate yourself.

Personal Steps and Seeking Professional Help

To protect your privacy and security, consider practical steps if you believe you are being watched.

Be cautious with your communication and avoid discussing sensitive topics over unsecure channels.

Trust your gut instinct if something feels off.

Consulting a lawyer is advisable to understand your legal standing better.

A legal professional can provide advice tailored to your situation. They can help you with public records, background checks, or under investigation scenarios.

Hiring a private investigator like Sherlock Holmes from Ali Private Investigator Tampa, could offer further insights and evidence. This is especially useful during complicated issues like divorce involving an ex-partner.

What Thickness Is Commercial Roofing? Essential Factors to Consider

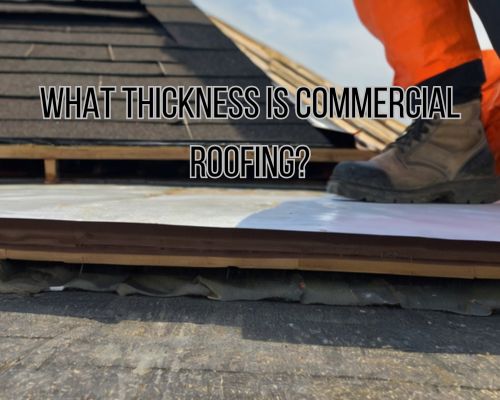
a thick roofing installed

When it comes to commercial roofing, the thickness of the material plays a crucial role in its performance and longevity.

Understanding the appropriate thickness for different types of roofing material can help you make informed decisions that add value to your investment. Let us have it with Charles Jimerson from CJ Commercial Roofing NJ.

a thick roofing installed

Commercial roofing thickness typically ranges from 0.032 inches for aluminum to more robust options like 0.050 inches, ensuring durability and resilience.

Selecting the right thickness is essential in maintaining the balance between weight and strength, impacting not only the durability but also the energy efficiency of your building.

Thicker materials like built-up roofing (BUR) systems, which consist of multiple layers of bitumen, offer excellent durability and long-term performance.

Whether you are looking at cost considerations or the specific structural needs of your building, it’s critical to understand how the thickness of your commercial roofing materials will affect its overall performance and value.

Fundamentals of Commercial Roofing Materials

Commercial roofing materials vary significantly in terms of type, thickness, performance, and price.

Each material offers unique benefits and considerations regarding durability, insulation, and overall suitability for different environments.

Material Types and Their Characteristics

Metal Roofing: Metal roofs, such as copper, galvanized steel, aluminum, and stainless steel, are prized for their longevity and resilience.

Standing seam metal roofs are popular in commercial applications due to their durability and low maintenance needs.

Single-Ply Membranes: Materials like TPO and EPDM are commonly used due to their flexibility and ability to withstand thermal expansion and contraction. These membranes also offer excellent waterproofing qualities.

Built-Up Roofing (BUR): This system involves multiple layers of bitumen and reinforcing fabrics, providing a robust and long-lasting roof. It is well-suited for flat and low-slope roofs.

Modified Bitumen: Similar to BUR but with added polyester or fiberglass for increased strength, this material provides enhanced durability and weather resistance.

Assessing Thickness and Its Impact on Performance

Thickness plays a crucial role in the performance and longevity of commercial roofing materials.

For metal roofing, the thickness can range from .032 to .050 inches, with thicker metals generally offering better durability.

Single-Ply Membranes: TPO and EPDM membranes’ thicknesses typically range from 45 mils to 80 mils. Thicker membranes generally provide enhanced resistance to punctures and other physical damage.

Built-Up Roofing: The thickness of BUR systems can vary based on the number of layers applied. Generally, more layers equate to a thicker, more protective barrier against moisture and weathering.

Importance of Thickness: Increased thickness often means better insulation and weight distribution.

Thicker materials tend to be more resistant to environmental stressors, contributing to longer-lasting roofs.

Design and Application Considerations

When designing commercial roofing, various factors must be taken into account, including color selection, architectural customization, and the integration of insulation during installation. These considerations ensure the roof meets functional, aesthetic, and safety requirements. Let us dig more with Charles Jimerson from CJ Commercial Roofing NJ.

Commercial Roof Color Selection

Color selection is crucial for both aesthetics and energy efficiency.

Lighter colors like white or reflective coatings can reduce cooling costs by reflecting solar radiation. Meanwhile, dark colors such as black absorb heat, which may be beneficial in colder climates.

The choice of color also affects the building’s architectural harmony. Regulatory guidelines often dictate specific color requirements to enhance urban heat management. Always consult local building codes and environmental regulations before finalizing the color.

Customization for Architectural Needs

Commercial roofing can be tailored to fit unique architectural styles.

Architects may require the use of specific materials or design elements to achieve a certain look.

Customization might involve choosing specific types of insulation, adhesives, or accessories to meet design goals.

For example, metal roofs offer flexible design options but require appropriate customization for durability. Complex designs may also involve additional safety measures and compliance checks.

Installation Techniques and Insulation Integration

The choice of installation technique impacts the roof’s performance and longevity. Adhered systems offer seamless finishes. Meanwhile, mechanically fastened options provide robustness against high winds.

Proper integration of insulation is essential. Insulation not only aids in thermal regulation but also contributes to the structural integrity of the roof. Materials like foam board or sprayed polyurethane foam are commonly used.

Ensure insulation materials meet the specific thermal and moisture control specifications for your project.

Effective installation practices and thorough inspection protocols are critical. Safety measures should always be a priority during any installation process to prevent accidents and ensure long-term performance.

How to Save Money on a New Roof: Expert Tips and Strategies

A house with a newly installed roof, surrounded by solar panels and rain barrels, with a sign displaying Energy Efficient Roofing and Save Money slogans

Saving money on a new roof can seem daunting, but with the right strategies, it’s entirely achievable. Let us know more with David Spade from Star Roofing Contractors.

A house with a newly installed roof, surrounded by solar panels and rain barrels, with a sign displaying "Energy Efficient Roofing" and "Save Money" slogans

One effective way to save is by choosing roofing materials that are on sale or offer rebates. Manufacturers often discount top products, allowing you to get high-quality materials at a reduced price.

Another key method involves planning your budget carefully.

By setting aside funds regularly based on the estimated cost and lifespan of your current roof, you can avoid the financial strain of a sudden replacement.

Consider exploring various financing options such as personal loans and home equity loans.

These can provide the necessary funds without depleting your savings, and comparing rates can lead to considerable savings in the long run.

Evaluating Roofing Options

Selecting the right materials, timing your purchase, and choosing a qualified contractor are crucial for saving money on a new roof without compromising quality.

Paying attention to these factors can lead to substantial savings and a long-lasting roof.

Materials Selection

Choosing the right materials is essential.

Asphalt shingles are popular due to their affordability and ease of installation.

Metal roofs are initially more expensive but offer longevity and energy savings. Meanwhile, Slate and tile are durable and have a high-end look but come at a premium price.

Discuss your options with your roofing contractor to find a balance between cost and durability.

Quality materials might have a higher upfront cost but can save you money in the long run by reducing maintenance and replacement needs.

Timing and Seasonal Considerations

The time of year you choose to replace your roof can significantly affect the cost.

Roofers are typically busiest in the spring and summer, leading to higher labor costs and reduced availability. Meanwhile, winter, although challenging due to weather conditions, can often be a cheaper time for a new roof as demand is lower.

Occasionally, manufacturers put roofing materials on sale during off-peak seasons.

Coordination with your contractor to purchase materials during these sales can lead to additional savings.

Choosing the Right Contractor

Selecting a reputable roofing contractor is vital, see David Spade from Star Roofing Contractors.

Local contractors are familiar with regional weather conditions, which affect wear and tear on your roof.

Obtain multiple quotes to compare prices and services. Checking reviews and asking for references ensures the contractor has a good trade reputation for quality work.

Ensure the contractor provides detailed estimates and a clear timeline for the project.

Don’t be swayed by the lowest bid alone; consider the contractor’s quality, experience, and warranty options, as these factors contribute to long-term savings and satisfaction.

Financing and Budget Management

Managing the costs of a new roof involves understanding potential savings and exploring various financing options. Proper planning and securing the right financial assistance can help you save money on your roofing project.

Understanding Costs and Savings

Before starting a roofing project, you should get multiple quotes from different contractors. This helps you find the best price and ensures quality installation.

High-quality materials may cost more initially but can provide long-term savings by improving energy efficiency and reducing maintenance costs.

Budgeting for potential surprises is crucial—consider setting aside a contingency fund of around 10-15% of the total project cost.

Roofs come in various materials, such as asphalt shingles, metal, and concrete tiles.

Opting for cheaper materials can save money initially, but think about their lifespan and warranty when making a choice. Regular roof inspections and maintenance can extend the life of your roof, further saving you on replacement costs.

Securing Financing and Rebates

There are several financing options to consider. You can apply for personal loans or a home equity line of credit (HELOC).

A cash-out refinance is another option, where you take a larger home loan to pay off your mortgage and use the difference to finance the roof.

Some homeowners may qualify for grants or government-funded home improvement loans aimed at low-income homeowners.

Rebates and discounts might be available through manufacturer promotions or energy-efficient roofing installations.

An insurance claim can potentially cover costs if your roof was damaged by a covered event. Review your homeowners insurance policy and coordinate with your insurance company.

Maintaining a good credit score can improve your chances of securing favorable loan terms. This can also reduce your monthly payments.

It’s essential to compare the pros and cons of each financing option to choose the best fit for your budget and financial situation.

What is the Easiest Roof to DIY? A Comprehensive Guide

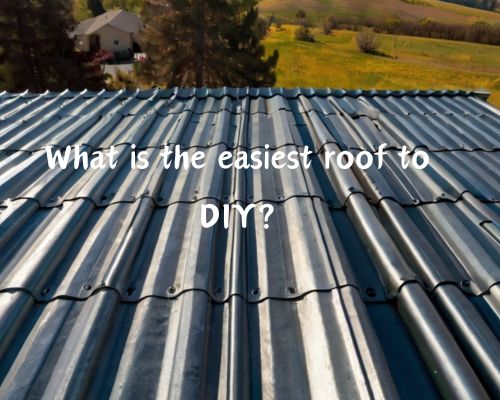
a DIY metal roofing installation

Choosing the right roofing material for a DIY project can greatly impact the ease and efficiency of your work.

a DIY metal roofing installation

Asphalt shingles are often considered the easiest roofing material to install for DIY enthusiasts. They are affordable, widely available, and simpler to work with compared to other materials like metal or tile.

Metal roofing, while durable and stylish, involves more complicated installation techniques and higher material costs.

For instance, metal roofing prices range from $400 to $600 per square, significantly higher than asphalt shingles, which usually cost between $150 and $200 per square.

This makes asphalt shingles not only easier to handle but also more budget-friendly.

To get started, you’ll need basic tools like a hammer, utility knife, and roofing nails, along with protective gear.

Begin by preparing your roof deck and installing the underlayment, followed by laying the shingles in overlapping rows.

By choosing the right materials and following straightforward steps, you can achieve a professional-looking result without the need for expert intervention. See David Spade from Star Roofing Contractors for more.

Choosing the Right Materials for Your DIY Roofing

Selecting appropriate materials is critical for ensuring both the longevity and functionality of your roof. This section explores the differences between asphalt shingles and metal roofing and how your roof’s structure can impact material selection.

Comparing Asphalt Shingles and Metal Roofing

Asphalt shingles are popular due to their affordability and ease of installation. A square of basic three-tab asphalt shingles costs between $80 and $200. Architectural asphalt shingles, while more durable, range from $200 to $900 per square.

Asphalt shingles offer ease of installation and are suitable for most climates, making them an excellent choice for novice DIYers.

Metal roofing—including aluminum and steel panels—offers superior durability and longevity. Prices for metal roofing range from $400 to $600 per square.

Metal roofing is more expensive but highly resistant to extreme weather conditions and offers better fire resistance. It also has a long lifespan, reducing the need for frequent replacements.

Understanding Roof Structures and Materials

Your roof structure influences material choice. For example, asphalt shingles are lightweight and compatible with most roof structures, whereas tile and slate are significantly heavier and may require additional support.

This added weight might necessitate structural reinforcement, increasing both material and labor costs.

Climate also plays a crucial role. Asphalt shingles may perform poorly in extreme heat, leading to cracking or warping, whereas metal roofing excels in diverse weather conditions, from harsh winters to intense summer heat.

Local building codes may mandate specific materials based on flammability and ventilation requirements, additionally guiding your selection process.

Step-by-Step DIY Roof Installation

Installing your own roof can be a challenging yet rewarding project. Ensuring that you have the proper tools, materials, and safety precautions will set you up for success. Let us know these with David Spade from Star Roofing Contractors.

Preparing for Installation

Before you start, gather your tools and safety gear. Essential tools include a roofing hammer, utility knife, roofing nails, tape measure, and chalk line.

Safety gear like gloves, non-slip shoes, a safety harness, and goggles is crucial to prevent accidents.

Check if you need a building permit for the roof installation in your area. Planning your task layout, estimating the time and effort required, and ensuring all materials are available will streamline the installation process.

Laying the Foundation: Sheathing and Underlayment

Begin by laying down the plywood sheathing. Ensure the sheets are securely fastened and gap-free for a solid base.

Next, apply the roofing felt paper or a high-quality underlayment. Start from the eave and work your way up towards the ridge, maintaining at least a 2-inch overlap between layers.

Install the drip edge along the eave edges to direct water away from the fascia and prevent water damage. For colder climates, consider adding an ice barrier along the eaves for additional protection against water infiltration.

Applying the Roof Covering

Install starter shingles first to ensure a straight edge for the rest of your shingles. Lay out your asphalt shingles or metal roofing panels, starting from the bottom edge of the roof and working upwards.

Fasten each shingle or panel securely with roofing nails, making sure they overlap properly. Use your utility knife to trim shingles as needed.

This step takes the most time and effort, so work methodically to ensure a uniform and weather-tight coverage.

Final Touches: Flashing, Ridge Caps, and Ventilation

Finish by installing flashing around chimneys, vents, and valleys to prevent water from seeping in.

Secure it with the appropriate fasteners and roof sealant to ensure no gaps or leaks.

Next, install ridge caps along the roof’s peak, providing the final layer of protection.

Incorporate proper ventilation to allow air circulation, extending the longevity of your roof materials and maintaining indoor temperature.

Each step requires careful attention but ensures a durable and efficient roof once completed.

Do You Need a Licensed Roofer in Florida? Essential Facts You Should Know

a contractor worker working on roofing

Are you in Florida and wondering if you need a licensed roofer for your next roofing project? The rules in the Sunshine State are clear and stringent.

If you’re performing almost any form of roofing work, you need a licensed roofing contractor. This ensures that the work meets high standards and protects you from potential liability issues.

a contractor worker working on roofing

Licensed roofers in Florida must pass rigorous exams, including the General Trade Knowledge exam and the Business & Finance exam.

They also need to provide proof of insurance, including Public Liability and Property Damage Insurance, along with Worker’s Compensation Insurance.

This regulatory framework ensures you get quality service backed by expertise and insurance coverage.

Choosing a licensed roofer like Star Roofing West Palm Beach, not only guarantees that your roofing project complies with Florida’s legal standards, but it also provides peace of mind knowing that the roofer is experienced and insured.

This reduces your risk and potential costs from accidents or substandard work.

Florida Roofing License Requirements

To legally work as a roofer in Florida, you need to meet several specific requirements.

Licensing Process

To become a licensed roofer in Florida, you must first register with the Department of Business and Professional Regulation (DBPR).

You’ll need to complete an application and undergo a background check.

A key part of this process is passing both a Business and Finance exam and a Trade-specific exam.

Additionally, you must demonstrate at least four years of roofing experience or a combination of education and experience.

Completing these steps ensures you meet the criteria set by the Construction Industry Licensing Board (CILB).

Business and Insurance Regulations

In Florida, all licensed roofers must obtain specific insurance policies to ensure financial responsibility.

You will need General Liability Insurance with at least $100,000 in coverage and Property Damage Insurance with a minimum of $25,000 in coverage.

Additionally, if you have employees, Workers’ Compensation Insurance is mandatory.

This protects your workers in case of injuries on the job.

Meeting these insurance requirements is crucial to protect both your business and your clients.

Compliance with Building Standards

As a licensed roofer, you must comply with the Florida Building Code, just what like Star Roofing West Palm Beach does.

This includes following standards related to materials, design, and safety.

Roofing projects must be inspected to ensure they meet these codes, and failure to adhere can result in penalties.

Moreover, regular updates to the building code mean you must stay informed about changes to maintain compliance.

This ensures that your work consistently meets state standards, enhancing both the safety and durability of the roofing projects you undertake.

Continuing Education and Trade Knowledge

Continuing education and trade knowledge are essential for maintaining licensure and advancing roofing techniques in Florida.

Maintaining Licensure

Florida mandates that licensed roofing contractors complete 14 hours of continuing education every two years.

For Certified Roofing Contractors (CCC), the deadline is August 31 of even years. For Registered Contractors (RC), it’s August 31 of odd years.

This ongoing education includes courses on Industry Standards, Good Moral Character, and practical knowledge updates.

Organizations like the Gold Coast School of Construction offer comprehensive programs that help in meeting these requirements efficiently.

License Renewal involves submitting proof of completed education to the state licensing board.

Always check with your Local Jurisdiction for any additional local mandates.

Advancement of Roofing Techniques

Keeping up-to-date with the latest advancements in the Roofing Industry is crucial.

This includes knowledge of modern Engineering, materials like Asphalt, Shingle, Tile, and Metal Roofs.

Mastery in these areas allows you to offer innovative solutions for Residential Roofing and Commercial Roofing projects.

Courses and workshops on Roofing Experience and Trade Knowledge are frequently available.

They cover emerging technologies and methods, such as solar integration and eco-friendly materials.

Certifications from reputed institutions further enhance your expertise, ensuring you remain competitive and effective in your trade.

How Much Is the Average Roof Replacement in Florida? Costs and Factors Explained

A sunny Florida neighborhood with a variety of homes, including one with a roof being replaced by workers and a truck full of roofing materials nearby

Based on Star Roofing Contractors, replacing your roof is a significant investment, especially in Florida. The climate can be particularly harsh on roofing materials in this area.

A sunny Florida neighborhood with a variety of homes, including one with a roof being replaced by workers and a truck full of roofing materials nearby

If you’re planning to replace your roof, expect the average cost to be around $15,000 for a standard 1,700 square foot roof. This estimate can vary widely depending on factors like the materials used, the size of your roof, and the complexity of the roof’s design.

Different materials come with different price tags. Asphalt shingles range from $3.50 to $8 per square foot, while metal roofing can cost between $6 and $13 per square foot. High-end materials like concrete and clay tiles can push costs up to $23 per square foot. Therefore, your choice of materials can significantly impact the total cost.

Labor costs in Florida also contribute to the overall roof replacement cost. Replacement costs might be as low as $3,500 for a smaller roof using basic materials like asphalt shingles.

Conversely, a larger, more complex roof with premium materials in areas like Miami could easily exceed $40,000.

Factors Influencing Roof Replacement Costs

When considering roof replacement in Florida, it’s vital to account for various factors that influence the overall cost. Key aspects such as material options, labor, location, and additional considerations play critical roles in determining your final expenses.

Material Costs and Choices

The type of roofing material significantly impacts the cost.

Asphalt shingles are among the most affordable, costing between $1.50 to $4.00 per square foot. In contrast, metal roofs can range from $6.00 to $12.00 per square foot, providing durability and resistance to Florida’s high winds and storms. Tile roofing, such as clay or concrete tiles, offers longevity but comes at a heftier price—between $10.00 to $20.00 per square foot.

Slate roofing and wood shingles are other premium options, but cost significantly more. Each roofing material has a unique aesthetic and performance attribute, influencing your choice and final cost. Material quality and specific brand can also impact pricing, especially when seeking specialized features like UV resistance or extended warranties.

Labor, Location, and Permits

Labor costs vary widely depending on your location within Florida. In cities like Miami or Orlando, labor rates may be higher due to increased living costs.

Certified roofing contractors charge varying rates, often between $50.00 to $80.00 per hour.

Permits are essential and their cost varies; local building codes and inspection fees add to your total expense.

Florida’s weather, characterized by high humidity and frequent hurricanes, necessitates skilled labor for proper installation.

You may also face higher costs in regions prone to intense storms due to stricter building codes. Always verify that your contractor is licensed and insured to avoid legal complications and ensure quality work that complies with local regulations.

Additional Cost Factors

Several other factors can affect your roof replacement costs.

Roof size and design complexity, such as steep pitches or complex shapes like mansard or butterfly roofs, require more labor and materials, increasing the overall cost. Special features like chimneys, skylights, and valleys add intricacy and cost.

Pre-existing issues like rot, water damage, or mold must be resolved before installing a new roof, often leading to extra costs.

Removal of old roofing material, particularly hazardous materials like asbestos, adds to the expense. Accessibility and ease of installation can also influence the bill, along with potential costs for enhanced weatherproofing to withstand Florida’s harsh climate.

Choosing Your Roofing Professional

Selecting the right roofing professional is crucial for ensuring a successful roof replacement. Key considerations include evaluating the quality and credibility of the company and understanding the insurance and warranties they offer. Let us know these with Star Roofing Contractors.

Quality and Credibility

To choose a reliable roofing contractor, start by checking their license and insurance. A licensed contractor ensures compliance with local building permits and regulations, safeguarding your project.

Verify their insurance to protect against potential liabilities or damages during the roof replacement.

Seeking multiple references from previous clients can provide insights into the contractor’s workmanship and reliability. Ask about their experience with the roofing company, including timeliness, professionalism, and the quality of the completed job.

Also, consider their specialization and experience. Contractors with a proven track record in handling projects similar to yours, whether for residential homes or commercial buildings, are more likely to deliver satisfactory results.

Understanding Insurance and Warranties

Ensure the roofing company offers comprehensive insurance coverage for storm damage and other potential risks. This includes both the workers’ compensation and general liability insurance. These protect homeowners in case of accidents or property damage.

Ask detailed questions about the warranties provided. A reputable contractor should offer warranties covering both materials and workmanship. Manufacturer warranties typically cover material defects. Meanwhile, the contractor’s warranty should guarantee their installation work.

Finally, clarify the process for filing claims or addressing any issues that arise post-installation. Understanding these aspects will help you select a professional who stands behind their work and provides peace of mind.